How to use
Setup Blender Bridge
Make sure the 'Blender Bridge' add-on is installed and the feature in Plasticity is enabled. Refer to the setup instructions here.
Basic Usage
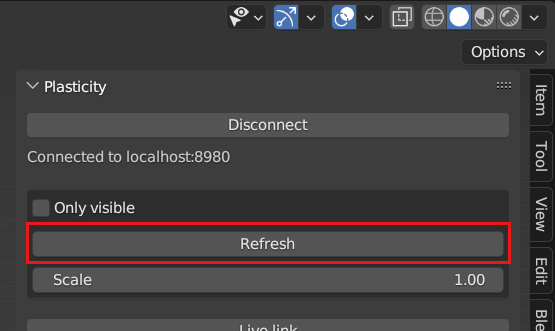
To transfer the Objects created in Plasticity to Blender, click the "Refresh" button in the Plasticity sidebar panel in Blender.
- Within Plasticity:
- Open Plasticity.
- Create objects that you want to transfer to Blender.
- Within Blender:
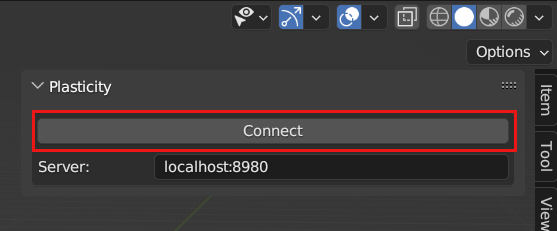
- Click the "Connect" button in the "Plasticity" sidebar panel. Once a connection is established, additional options will be displayed in the panel.
- Click the "Refresh" button in the "Plasticity" sidebar panel to transfer objects from Plasticity to Blender.
- The transferred objects will appear in the 3D viewport of Blender.
- All solids and Sheets in Plasticity will be transferred as Meshes in Blender.
- When 'Only visible' is disabled(default), invisible objects in Plasticity will be transferred to Blender as invisible objects. When 'Only visible' is enabled, invivible objects in Plasticity will not be transferred.
- 'Scale' option is abailable to scale the size.
- Click the "Connect" button in the "Plasticity" sidebar panel. Once a connection is established, additional options will be displayed in the panel.
- Within Plasticity:
- Edit the objects as needed.
- Within Blender:
- To update any changes made in Plasticity, click the "Refresh" button in the "Plasticity" sidebar panel.
Live Link
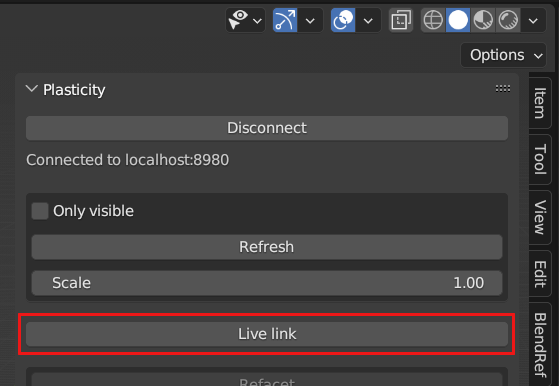
When Live Link is enabled, any changes made to the objects in Plasticity will be automatically transferred to Blender.
- Within Plasticity:
- Open Plasticity.
- Create objects that you want to transfer to Blender.
- Within Blender:
- Ensure that the Blender Bridge add-on is installed and activated.
- Click the "Live Link" button in the "Plasticity" sidebar panel.
- Within Plasticity:
- Edit the objects as needed.
- Within Blender:
- The changes will be automatically transferred to Blender.
Refacet Mesh
The Refacet Mesh option will automatically retopologize the mesh of the transferred object. This is useful for reducing the number of vertices in the mesh, which can improve performance in Blender.
- Within Blender:
- Select the transferred objects to be retopologized.
- Click the "Refacet" button in the "Plasticity" sidebar panel.
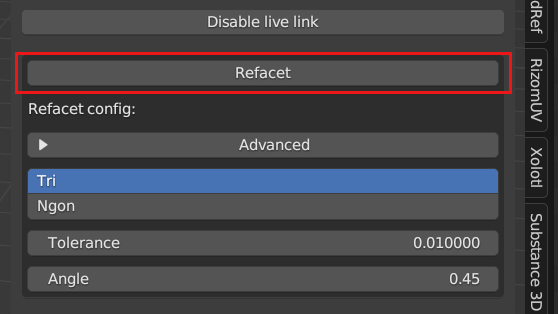
- You can specify the refacet config in the "Plasticity" sidebar panel.
- Tri/Ngon: The type of mesh to be generated. 'Tri' will generate a mesh with only triangles, while 'Ngon' will generate a mesh that includes polygons with five or more sides.
- Tolerance: The maximum distance between the original mesh and the retopologized mesh. A lower tolerance will result in a mesh that more closely matches the original mesh, but will also result in a mesh with more vertices.
- Angle: The maximum angle between the original mesh and the retopologized mesh. A lower angle will result in a mesh that more closely matches the original mesh, but will also result in a mesh with more vertices.
- Click "Advanced" button to show advanced options.
- Tri/Ngon: The type of mesh to be generated. 'Tri' will generate a mesh with only triangles, while 'Ngon' will generate a mesh that includes polygons with five or more sides.
- Min width: The minimum width of the retopologized mesh. A lower minimum width will result in a mesh with more vertices.
- Max width: The maximum width of the retopologized mesh. A lower maximum width will result in a mesh with more vertices.
- Edge Chord Tolerance: The maximum distance between the original Edge chord and the retopologized mesh.
- Edge Angle Tolerance: The maximum angle between the original Edge angle and the retopologized mesh.
- Face Plane Tolerance: The maximum distance between the original Face plane and the retopologized mesh.
- Face Angle Tolerance: The maximum angle between the original Fce angle and the retopologized mesh.
- Refacet automatically produces a "Mark Sharp" on the edges of the retopologized mesh.
- You can specify the refacet config in the "Plasticity" sidebar panel.
Utilities
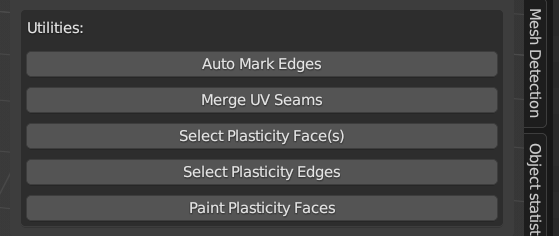
Auto Mark edges
- Mark edges as sharp or seams based on the selected faces, depending on the last operation panel.
Merge UV Seams
- Merge UV seams based on the selected faces.
Select Plasticity Face(s)
- Expand the selection of the faces based on the Faces from Plasticity.
Select Plasticity edges
- After selecting faces, execute the command to select edges based on the Edges from Plasticity.
Paint Plasticity Faces
- Paint random vertex colors based on the Faces from Plasticity.